[analyse_image type=”featured” src=”https://velo-cdn.outsideonline.com/wp-content/uploads/2026/03/BEGINNER-GRAVEL-BUILD-COVER.jpg”]
Gravel racing has become popular because it appeals to so many different types of cyclists.
Mountain bikers and road cyclists used to agree on so little, but gravel is a rare meeting ground. Both new cyclists and experienced racers have found gravel racing to be an outlet to test their limits, expand their fitness, and build community. At most gravel races, you will find someone doing their first big outing on a bike and a racer who has been at it for decades.
Nevertheless, for everyone at the race, gravel provides the canvas to either thrive with a perfectly tuned bike setup or flounder with something that is not quite right.
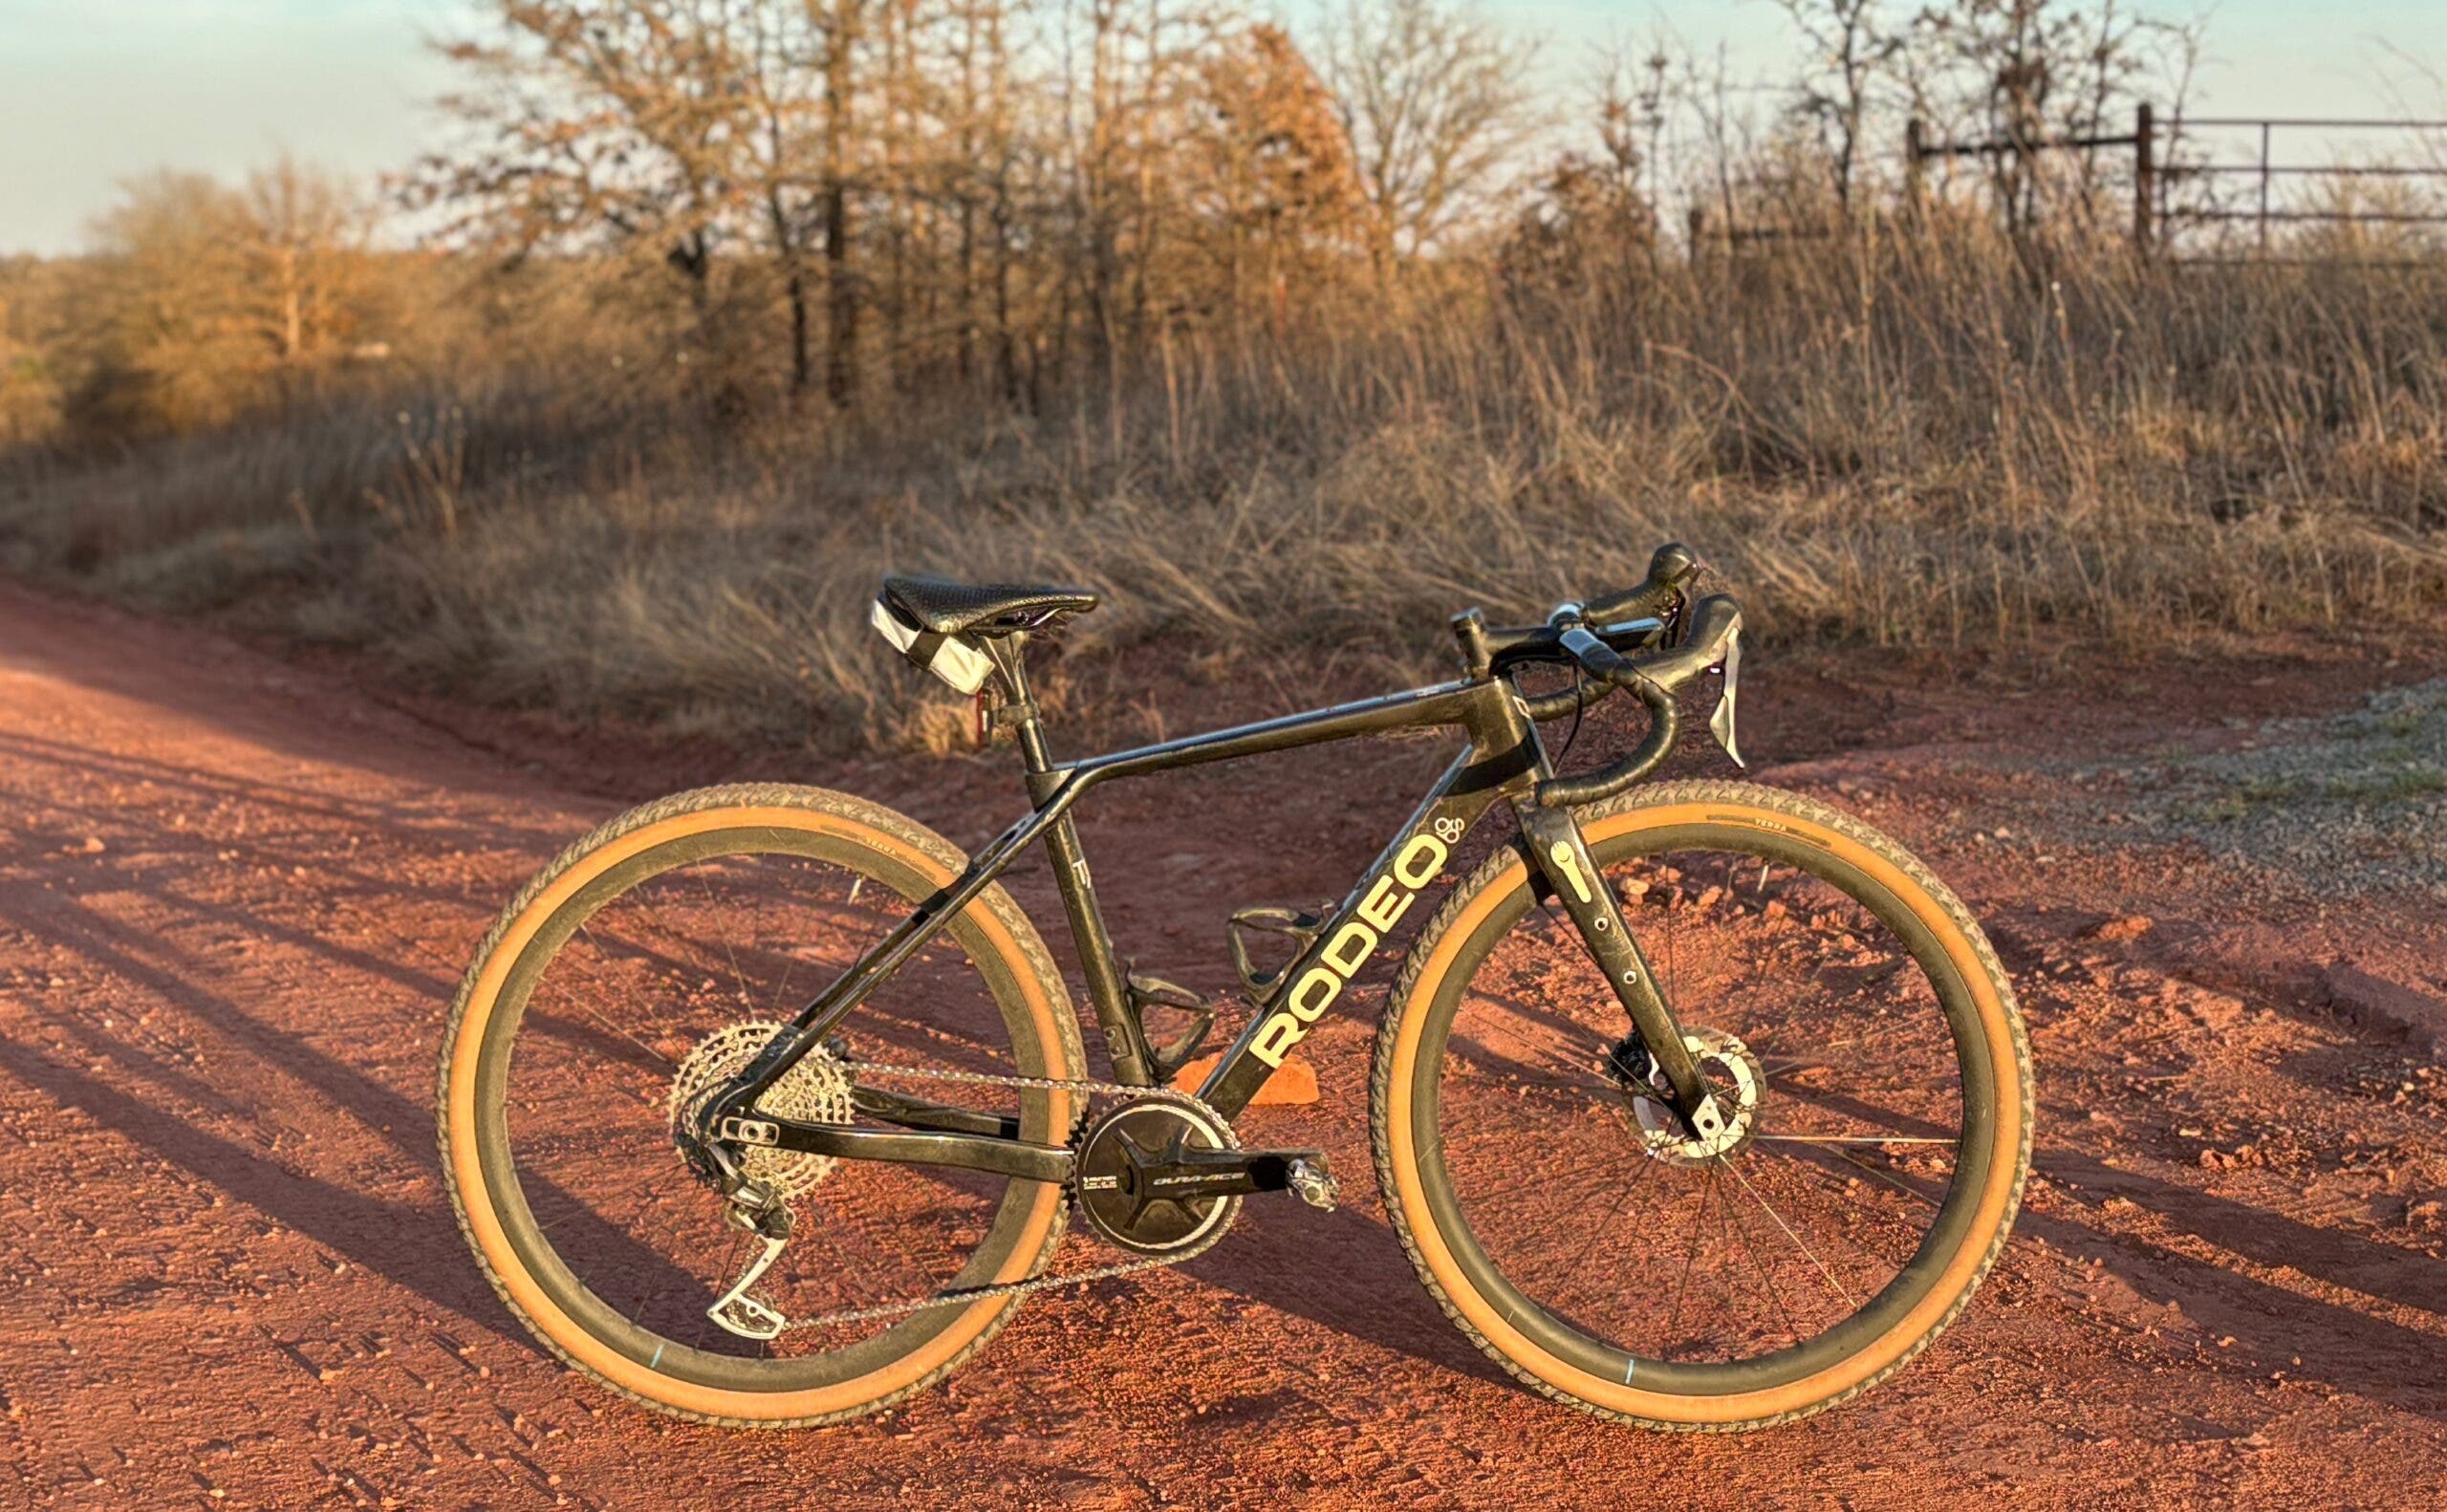
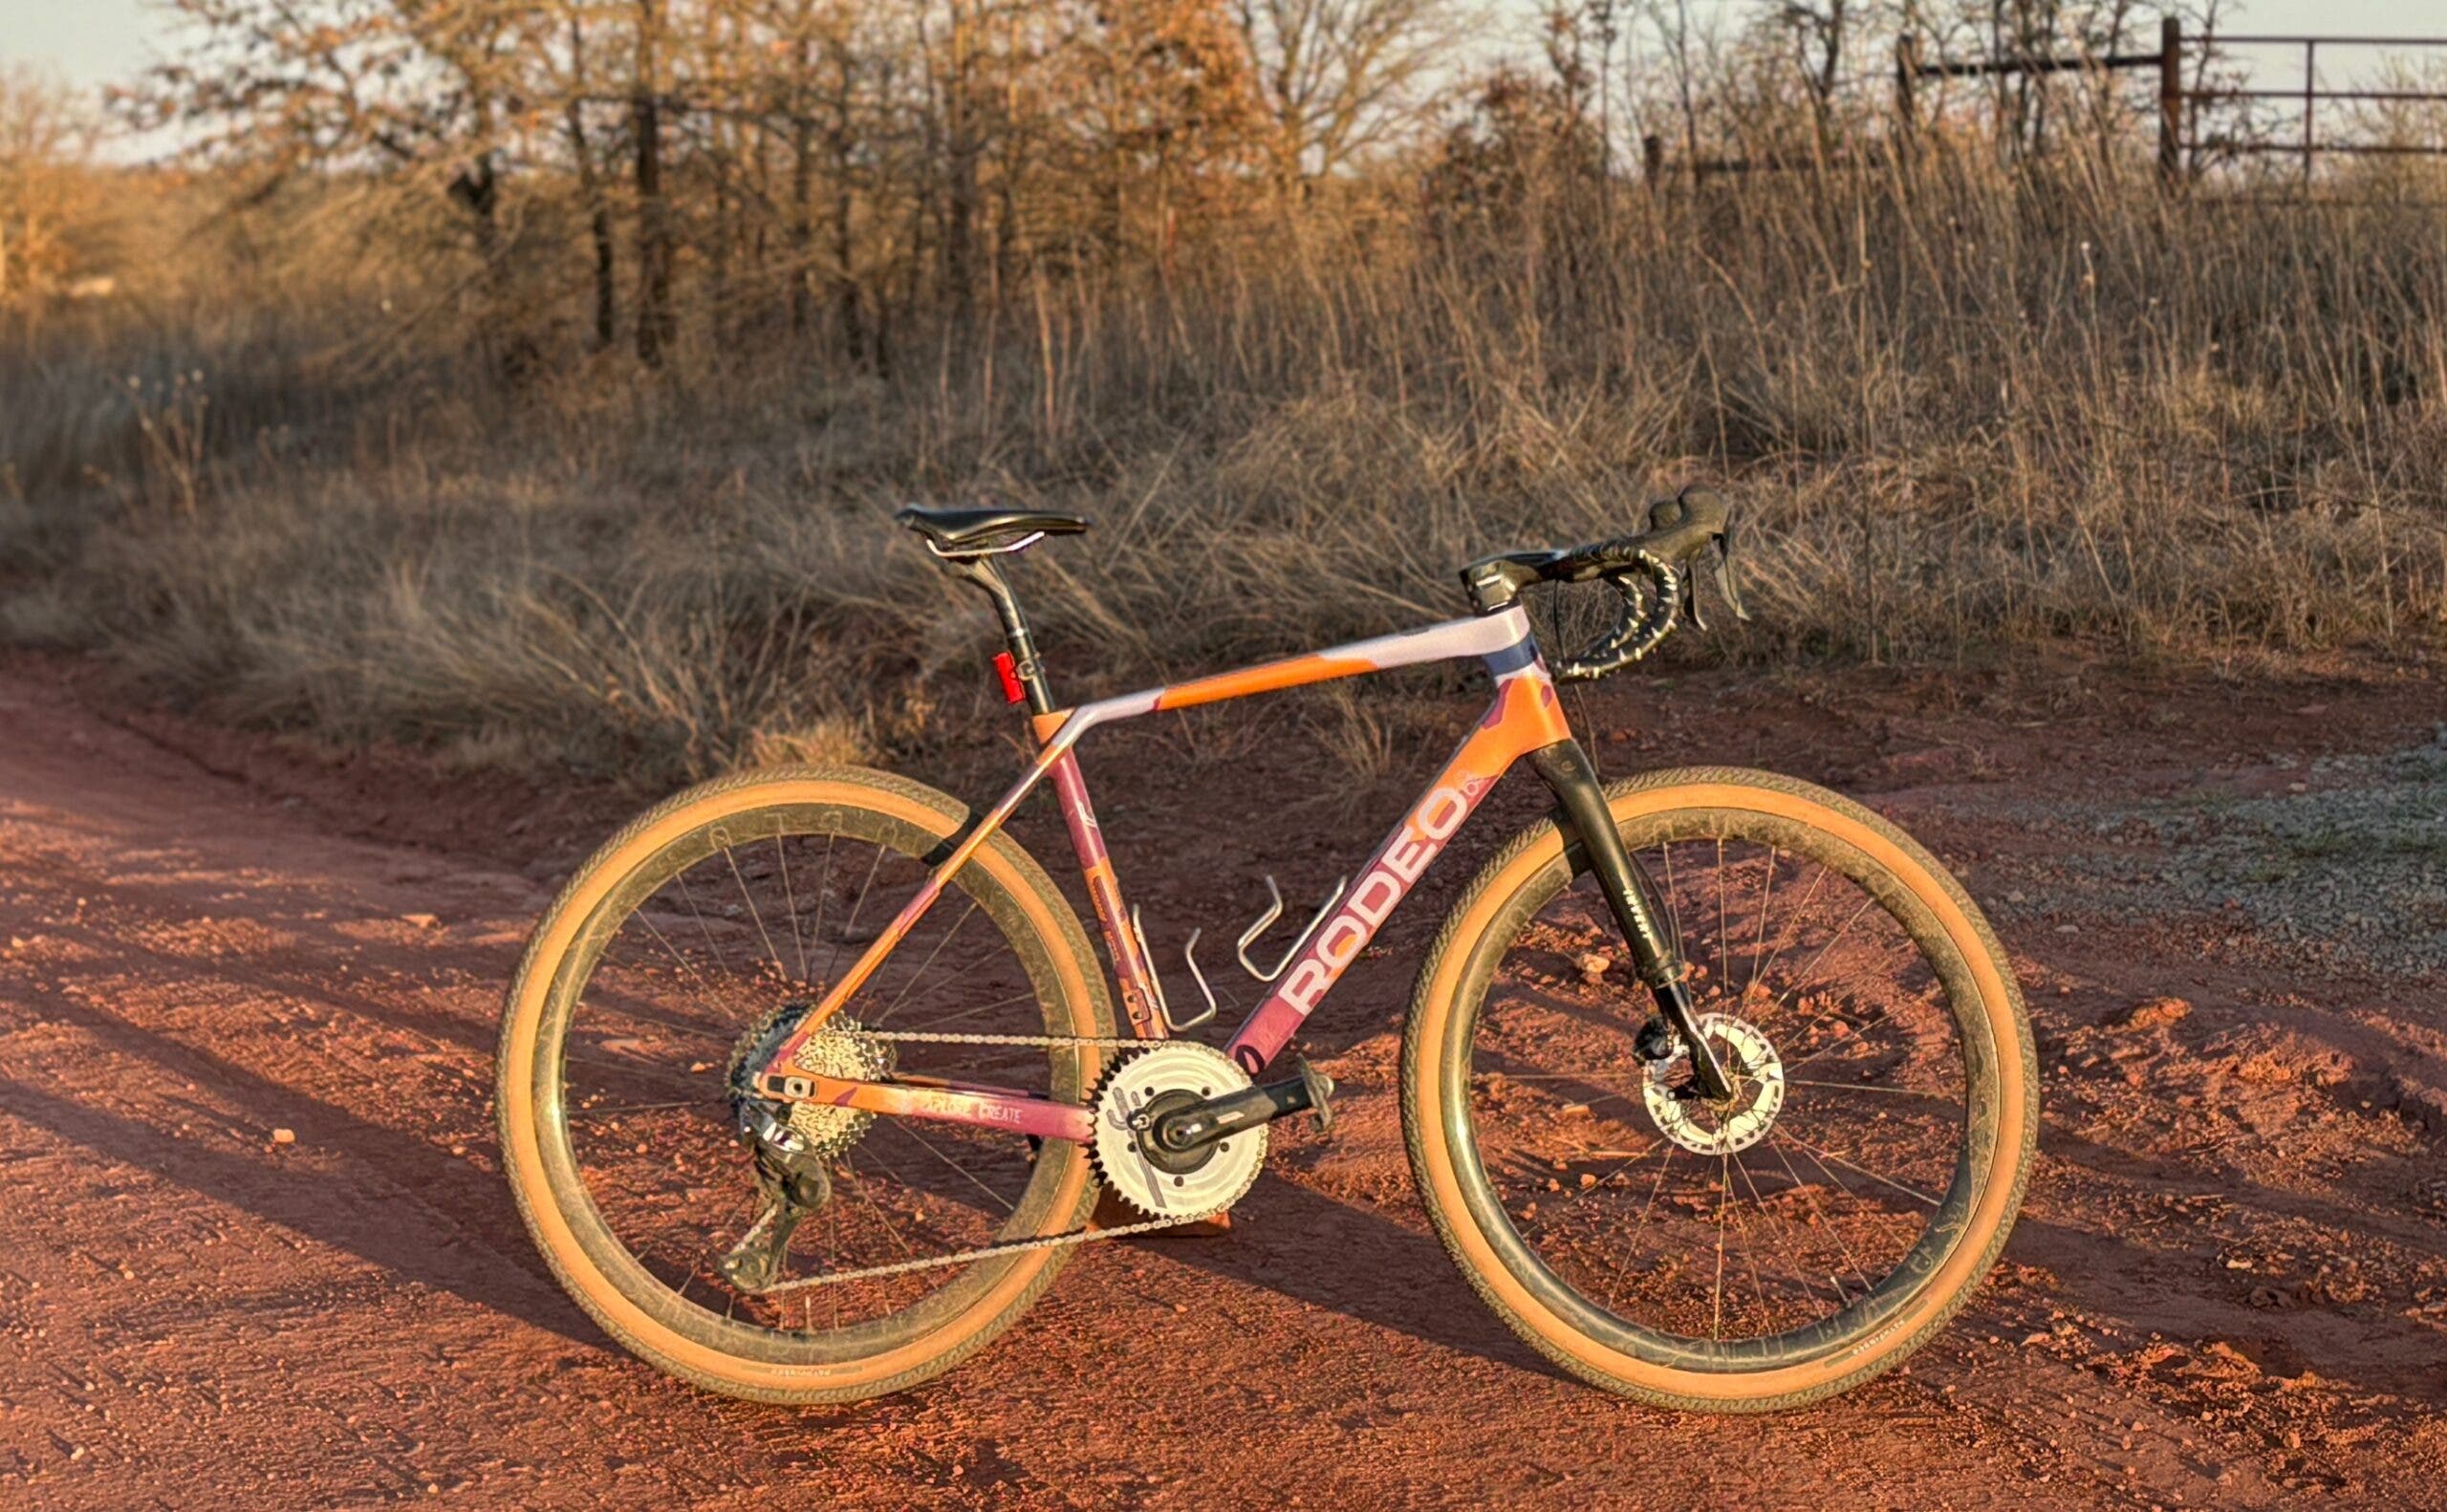
Just the other week, I got to feel both ends of the spectrum all in one event. I was racing the Mid South Gravel in Oklahoma with my partner, Bailey. This was my fifth time venturing to Stillwater for the race and probably my 30th or so gravel race overall. On the other hand, this was Bailey’s first gravel race after picking up cycling last July. As I prepared to go to the race, I realized that I was setting up two bikes for the race, with the same frame, in substantially different ways.
And yet, the race proved the builds were well suited for our different needs. That got me thinking: how should beginners set up their bikes differently from more experienced racers?
Where to Save Money and Where to Splurge on Components
A common method I use to recommend gear to new cyclists is to buy one step above the bottom. Going fully into the bargain bin is often tempting for a person unaccustomed to the price of cycling gear, but I fear that can leave people with components that are detracting from the experience. That is not what I want people new to the sport to feel.
From my perspective, that is part of the power of the GRX mechanical groupset. It sits perfectly in the quality versus cost matrix for folks getting into gravel racing, and it is versatile enough to also serve as a groupset that can cover road rides. That made it an easy choice to use on this first gravel bike build for Bailey.
That being said, in the run-up to the race, we made some key changes that definitely added to the cost of the build, but undoubtedly made the ride better. If you are to the point with riding that you are spending the money and time to race, I would suggest you also consider these upgrades:
Shorter cranks

One of the first upgrades that shorter riders should do is to check their crank lengths, as bike companies have been resistant to fully embrace the shorter crank revolution. Not everyone needs super short cranks; 170mm may be plenty short for a taller rider. But shorter riders, like Bailey who is 5’4”, should lean into the trend.
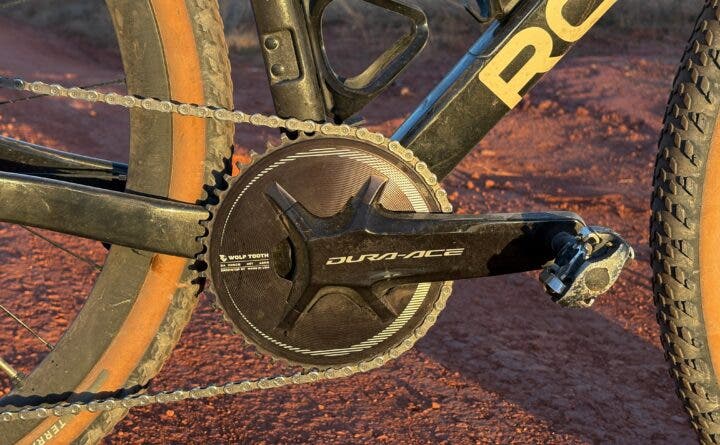
After starting with significantly longer cranks, before the race, we swapped to a 167.5mm Dura-Ace Shimano crankset. The 167.5mm is a bit of a strange length, and it was not fully intentional — as a cyclist journalist, I do have some rather particular spare parts in my bin — but it was a huge benefit for Bailey.
With the shorter cranks, her pedal stroke engaged more of her glutes and hamstrings, while also reducing stress on her lower back and hips. Additionally, the change alleviated concerns around toe overlap with higher volume gravel tires. For short riders, toe overlap has been a limiting factor in tire size, as smaller frames create a shorter distance between a turning wheel and the front of their shoe. Contact can be a disaster.
Getting the right-sized chain ring
When we swapped crank-lengths, it was a great opportunity to tinker with her chain ring size.
Bailey started with a 42t chainring that comes standard on a GRX crankset. This worked well for a while, giving her a great platform to keep whatever cadence she needed on any gradient, but as is the case with any rider who is gaining speed fast, optimal chainring size can change very quickly. Before long, riders will start to crave the ability to pedal a downhill or two at the expense of some flexibility on the easier gear choices.
What’s more, in Bailey’s case, the shorter cranks will also change the effective gear ratio with the same size chainring and cog. Shorter cranks will make turning a larger chainring easier, and vice versa. When we bumped down to 167.5 cranks, that gave us the flexibility to increase the chain ring size from a standard 42t ring to an aero 46t option from Wolf Tooth that is made to pair with a Dura-Ace crankset.
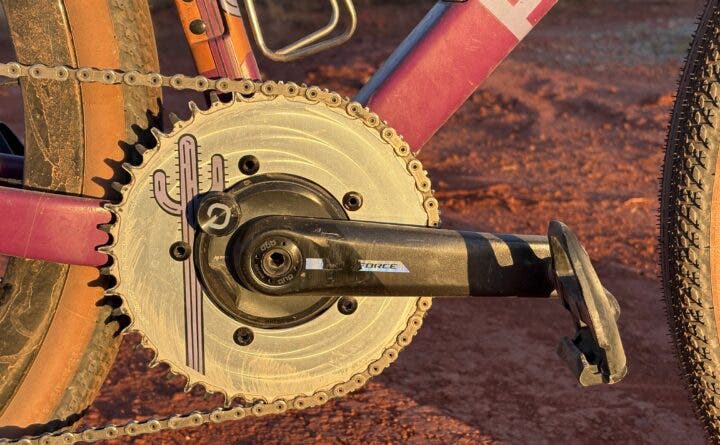
Altogether, that new crankset is the most advanced setup on the entire bike, as it is what most Shimano pros run for their races, but it is well worth it for Bailey despite her status as a first-time gravel racer. Throughout the race, she found that she had much more pace on the downhills than the racers around her and didn’t have the same issues with quad fatigue that she felt on longer rides heading into the event.
Tire choices are key, but don’t copy and paste what the pros use
Talk to any gravel racer, and tires are bound to come up. For a new gravel cyclist, this can be both overwhelming and boring, but the conversations are frequent for a reason: it is, without a doubt, the most important choice a rider can make.
In fact, many gravel cyclists will make bike purchasing decisions based in part on a frame’s capacity to tolerate certain tire volumes — it is THAT important.
Yet, just because it is a vital decision for everyone, it is not vital in the same way. Experience is a key input in the equation that exists for every rider at any race. For new riders, this means don’t always copy what the pros do.
The best choice isn’t always the fastest
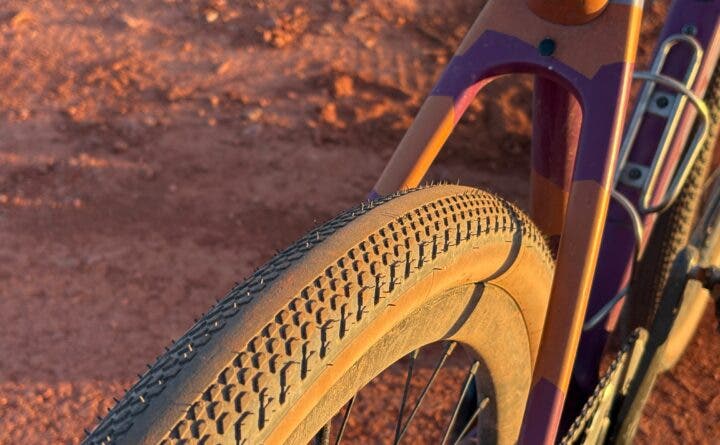
Recently, I wrote a review of the Specialized Pathfinder TLR tire. The Pathfinder is a fast tire and a great option for a race like Mid South. It was the tire I chose to race, as its semi-slick tread profile and 50mm volume paired super well with my bike setup for that course.
It was not, however, a good choice for Bailey. If she had ridden those tires, her day could have turned out differently. New gravel cyclists need speed, but traction and predictability are far more important. Crashing is always a slower option.
While the Specialized Pathfinder is not a great tire for a new gravel cyclist, the Specialized Terra is, with its elevated knobs and a consistent tread that allows for better braking and cornering. Like the Pathfinder, the Terra has 40,45, and 50mm sizes, which for Bailey allows for the same 50mm of volume that smooths out the bumps, boosts traction, and mitigates flats.

I would say that for newer riders, going bigger with tire volume is better. Not only does it give more traction, but it could also provide bigger efficiency and speed gains. At lower speeds, rolling resistance is a larger factor in the overall speed equation compared to air resistance, so adding a few millimeters of volume might be the faster choice AND the safer choice for a new gravel cyclist.
Ultimately, we did not go with a 2.2 inch tire option for Bailey’s Mid South bike — even though we could have with the Rodeo Labs Traildonkey frame — because it would have thrown off both the gear ratio and it could have caused some toe overlap. Nevertheless, if you can fit it, don’t be afraid to try big tires as one of your first adjustments. Mountain bike-sized gravel tires should not only be for the pros.
Prioritize flexibility until you have conviction in what you’re doing
There is a temptation to make gravel bikes perfectly tuned to whatever is trending. Gravel cycling is a beautifully specific discipline once you get into it, and that specificity can unlock interesting performance gains and improvements over time.
But don’t go rushing to follow trends before you know what rabbit-holes you actually would like to chase.
Give yourself a bailout gear
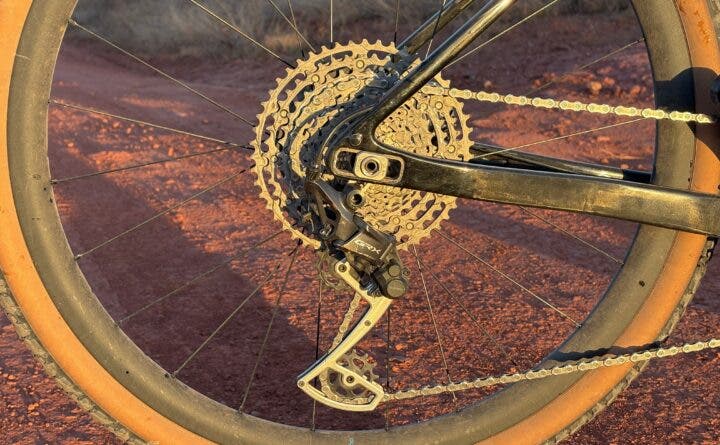
A balance that gravel gearing needs to strike is to create a broad range of gears, both on the low and high end, and to manage the jump between cogs. The tough part of this dichotomy is that with 1x gearing, those two goals are opposed to one another.
What makes a large range is the number of teeth in the cogs of a cassette. A 10-51t cassette has a bigger range of gears compared to a 10-45t cassette. In other words, the “bigger” cassette would have an easier gear at the top of its cassette than the “smaller” option. On the flip side, to achieve that range, the “bigger” cassette will have bigger gaps between gears than the “smaller” cassette. This means that when you change gears, the shifts on a 10-45t cassette will be less severe and a rider’s cadence will be more consistent.
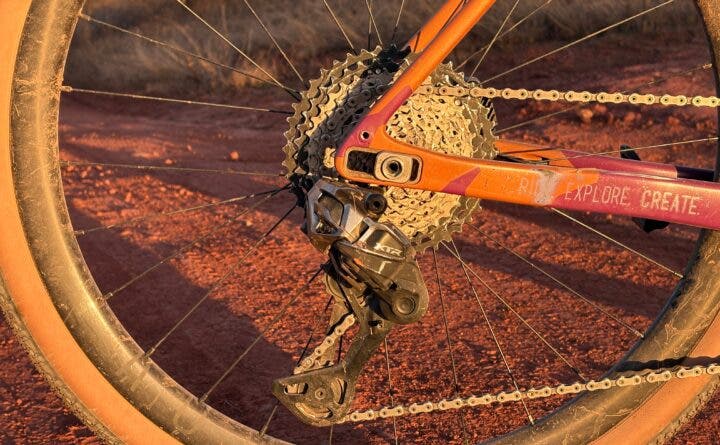
It is an either-or choice between having a bailout option or having small jumps between gears. For high-speed gravel racing, the jumps between gears can really matter. In my build meant for the high speed of the Friday pro race at Mid South, where the speed is well over 20 miles per hour most of the time, I wanted the tighter gears of Shimano’s 10-45t cassette. But, if you are new to the sport, forget about gear jumps; give yourself a bail-out.
This meant that Bailey’s bike was set up with a “mullet,” 10-51t cassette on the wheel paired with a 46t chainring on the front. Sure, Bailey could have preserved the same bailout gear with a 10-45t and a smaller 42-44t chainring, but instead she gets to have both the benefits of the big gear on the downs, and a bailout for the steep uphills.
For new gravel racers, range should outweigh gear jumps.
Wait for the integrated bars and stems.
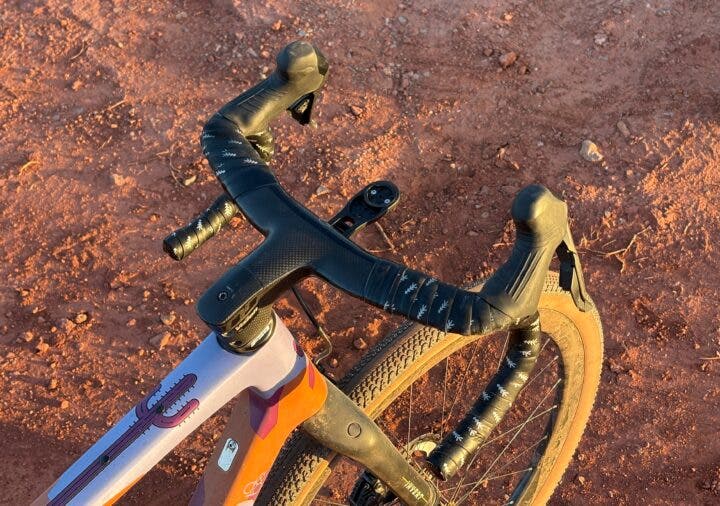
Of all the differences between the two bikes we had for the race, the cockpit was the biggest. This is my fourth year with the bike, and I have long settled on a handlebar position and fit. With that confidence, I made the change to a one-piece Vision Metron 5D road bar/stem combination that reduces weight, provides an aero benefit, and is great at hiding most of my bike’s hoses and cables.
None of this should be added to a new rider’s bike, and too often folks are prisoners to the current move towards integrated cockpits.
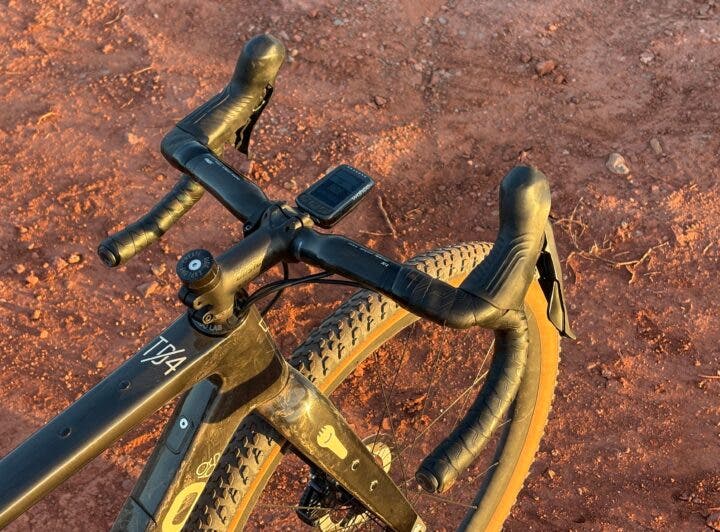
With Bailey’s bike, everything is external, and that has allowed us to easily swap between stems and bars over the last half a year. In total, we have tried four stem lengths to find what works best for her on the road. On an integrated setup, there are hours of additional work configuring the different combinations, even for a skilled mechanic. If you don’t have the skills and know-how, that could be hundreds of dollars.
Bike fits will help the process, but even the most experienced fitters might have a philosophy that requires extra tinkering after the initial fit. I would say keep the bike external and changeable for around 10,000 miles before you commit to something as concrete as a one-piece or fully integrated cockpit, if your bike can allow it.
Don’t get too specific with your bike right away
Last but not least, if you are new to the sport, don’t go too far down the gravel optimizing rabbit-hole! Everything you do to make your gravel bike geared towards a specific race will make that bike feel specific. For new cyclists, it is always better to be a generalist, so I recommend staying away from all the trappings of professional gravel optimization.
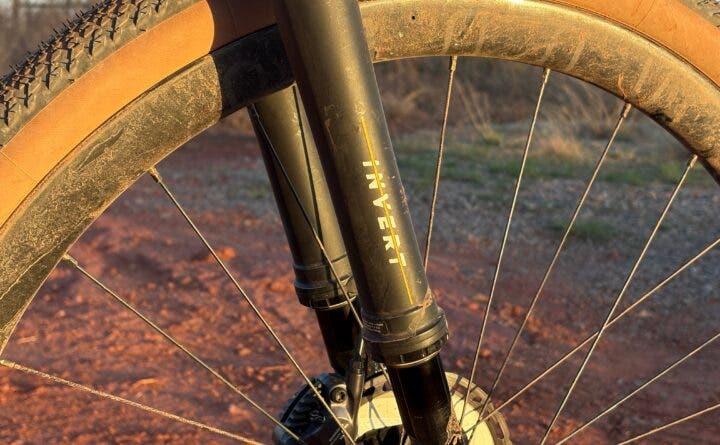
This means perhaps leave off the clip-on aero bars because they won’t be very popular on your local road group ride. Also, perhaps consider not going out of your way to find a gravel suspension fork if you want your gravel bike to still be a viable road riding machine.
For folks deep in the gravel world, go nuts. Make that bike perfect for the dirty side of the sport and make it your own. I have really enjoyed adding a suspension fork to my bike and experimenting with big tires, gravel-specific pedals, and creative bag uses. Yet, if I did that when I was just starting gravel, when I just had a gravel bike as my do-it-all machine, I would have found its limitations on the road quite frustrating.
Bailey’s bike is a great example of this. With a spare wheelset at home, it is a 20-minute swap to make the bike into something she is comfortable taking on long road group rides, just as her Mid South bike was good enough at letting her feel comfortable passing stronger cyclists on the technical downhills. A solid setup that can do both disciplines is really not that far apart if you keep the gravel setup grounded in simple, but effective, changes.
[analyse_source url=”https://velo.outsideonline.com/gravel/gravel-gear/set-up-bike-gravel-race/”]